Please note that this Go Digital course content was developed in 2017 and therefore should be used as a guide only as the referenced online services may have changed over time.
Week 2 - Create Your Website Using Squarespace
This week we kick off our ‘How to create your website’ Training Module. This will be the first week of four weeks and all weeks will focus on Squarespace.
I’ve chosen Squarespace because it is incredibly easy to learn for absolute beginners and it is really affordable with $12USD a month charges for everything including the ability to sell your products online.
It’s one of the most affordable options and a great place for beginners to get started. They also offer a 14 day free trial so you’ll be able to work along with part of the module for free.
In this lesson, we’ll be focusing on how to sign up to Squarespace and select your template.
What’s a template?
It’s your starting point for your website layout. Where the images, text, tables, menu layout, header, footer all start.
Squarespace is very easy to use and you can add / remove anything after selecting your template – you’re definitely not ‘stuck’ with anything.
If you choose a template that you don’t like – you can change it later.
But I’m getting ahead of myself.
Check out the videos below for the full walk through of this week’s training.
There’s also a written walkthrough below, but it is much briefer than the video and doesn’t include all of the extra tips.
Exercises for the week:
To get the most out of the free training, follow along by doing what you see demonstrated. How to do the following is all demonstrated in the videos and the written walkthrough below.
- Go to www.squarespace.com
- Click on Get Started
- Browse the templates, Click on view demo options for your favourites
- Once you’ve selected one, click on ‘Start with this design’
- Fill out the info on the forms
- Wait for the next steps in next week’s tutorial.
This week’s tutorial video has been separated into 5 parts of approximately 5 minutes each – total time to watch all the videos is about 20 minutes.
In Video part 1 of 5 I talk about why I chose squarespace and how to get to the site. Duration: 6:12
In video part 2 of 5 I demonstrate the first step of signing up and how to go through the template choices, as well as what to consider when choosing a template. Duration: 2:43
In video 3 of 5 I show you a Squarespace site I did for a client based on the Anya theme. So you can really see the before and after which is a great way to see the potential of a template. Duration 4:23
In part 4 of 5 I walk you through the signup process after you’ve selected a template. Forms, passwords, questions and so much more (not really any more but it sounds much more dramatic this way). Duration 4:29
In part 5 of 5 I give a very brief introduction to the interface, this will be expanded on in the next tutorial – this is for anyone who might be curious at this point and can’t wait a week. Duration: 4:20
Written Walkthrough:
The brief version of what’s in the videos.
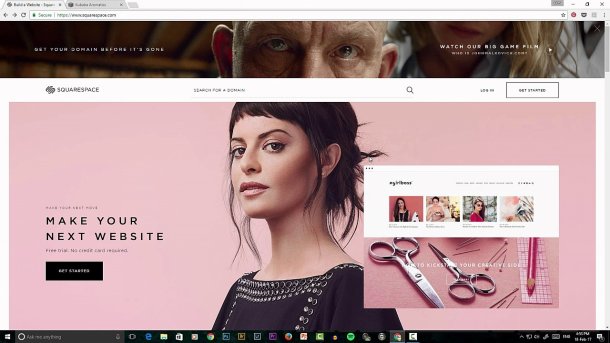
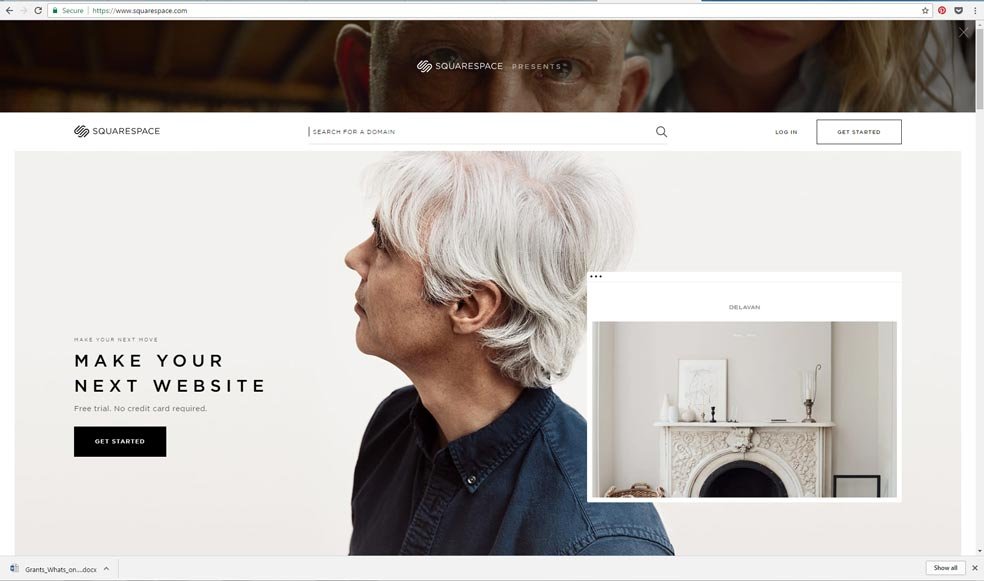
Step 1: Go to Squarespace
Open up your web browser (i.e. Internet Explorer, Firefox, Google Chrome, Safari or other).
In the web address bar type in https://www.squarespace.com/ It should look similar to the image below, although depending on how long it has been since time of writing, it may look different. Look out for the squarespace logo in the top left.
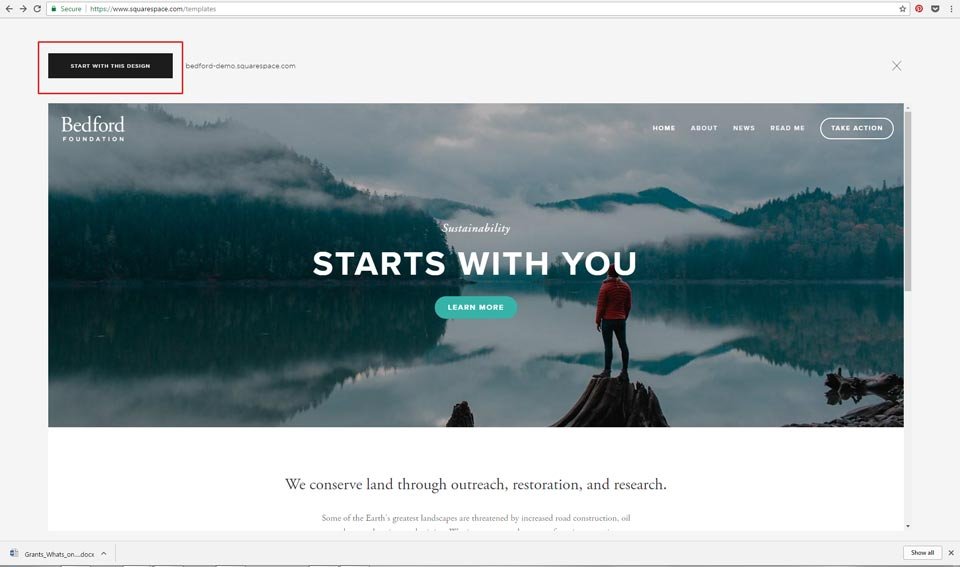
Step 2: Click the ‘Get Started’ Button
There’s a Get Started button in the top right (if the site looks different it may be in a different position but it shouldn’t be too hard to find)
The button is highlighted in a red box below.
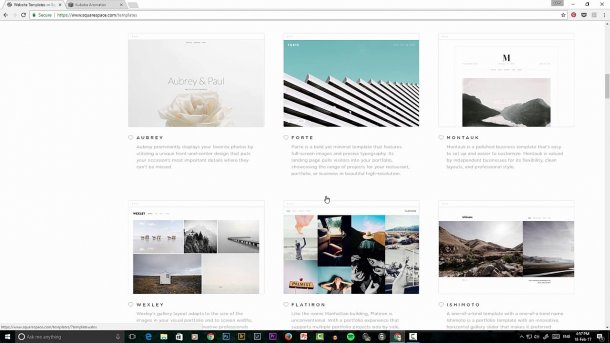
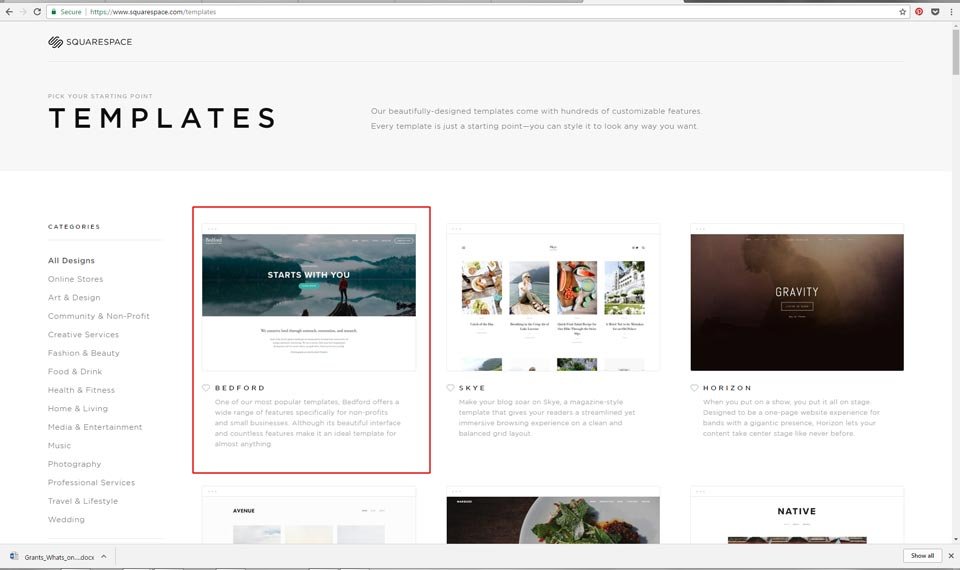
Step 3: Choose your template
The template is you starting position. If you missed the explanation of what a template is – then scroll back up to the beginning of this post. It’s your starting off point of your layout. You can add or remove anything you need to from this starting point. Anything you choose you are not stuck with.
You’ll see a page like the below.
You can browse through the categories on the left to find templates that enhance certain features, but don’t feel like what is in one category will only work for that type of business or product.
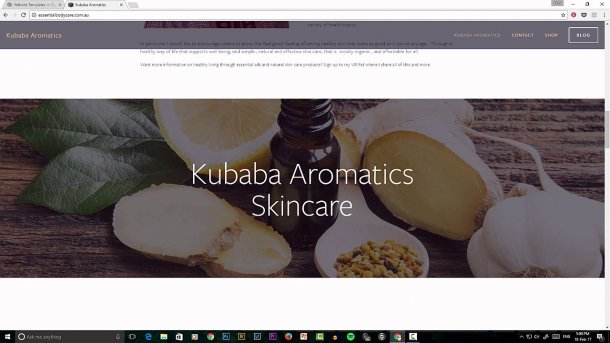
Recently, I used one of the templates in the wedding category for a skincare product sales business based near Warialda, NSW. In video Part 3 of 5 I compare the template and what I created from that starting point.
The image above highlights the categories area in red.
To take a closer look at a template, click on the image of the template:
Then click on the ‘preview design’ button on the right so you can then see a version where you can navigate the layout like a real website.
If you don’t see a Shop or a Blog in the site design – don’t worry! These can be added at any time and I’ll show you how to do this in the following tutorials.
Note: If you want to follow along with me exactly in future squarespace tutorials – I’ll be using the ‘Anya’ theme. You can select this and be able to follow along with matching screens etc. You can choose other themes, it will mean that your layout will be a little different.
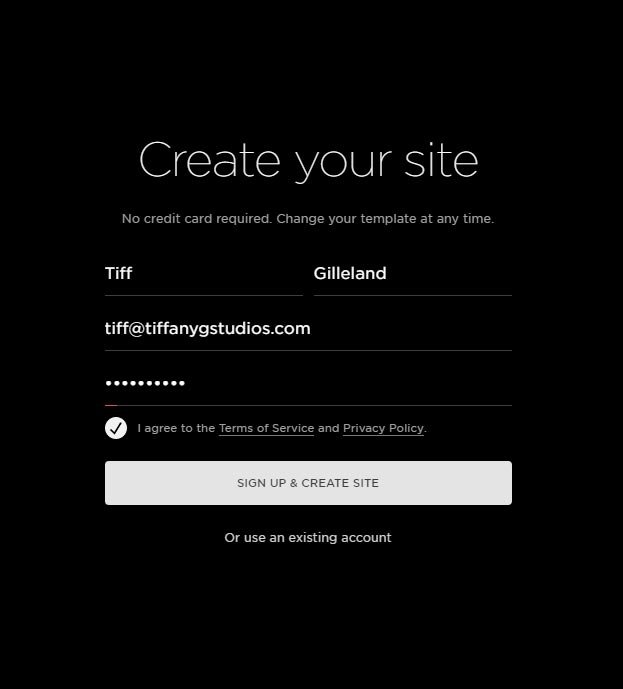
Step 4: Press the ‘Start with this design’ button and fill out the forms
Click on start with this design – highlighted in a red box in the image above.
Then you’ll be shown a series of forms.
Fill out your name, email address and create a password. See the image below for an example.
Click on signup and create button below to go to the next step.
Next, you’ll be prompted with some questions to answer. These are questions asked for square space to collect data – there are no right or wrong answers. I give an explanation of what I’m selecting and why in video Part 4 of 5 above.
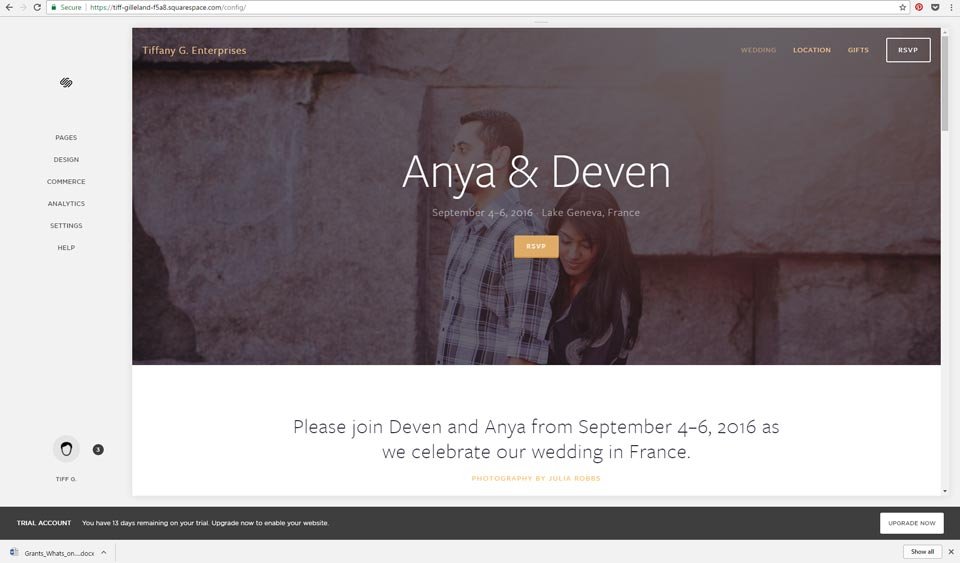
Step 5: You’re done when you see this screen
When you see a screen like that in the image below, you’ll know you’re done.


 Funding & Grants
Don't miss out on funding opportunities. Stay informed with our up to date online listings and email notifications.
Read More
Funding & Grants
Don't miss out on funding opportunities. Stay informed with our up to date online listings and email notifications.
Read More
 Skilled Migration
Our services help both applicants and employers, to learn more, develop plans, submit applications, and settle in.
Read More
Skilled Migration
Our services help both applicants and employers, to learn more, develop plans, submit applications, and settle in.
Read More
 Research and Analysis
Good research and analysis makes the case. How can our resources and services help your project or application?
Read More
Research and Analysis
Good research and analysis makes the case. How can our resources and services help your project or application?
Read More
 Information & Data Resources
With resources like REMPLAN, Regional Knowledge Base, and decades of data, discover how we can help your project.
Read More
Information & Data Resources
With resources like REMPLAN, Regional Knowledge Base, and decades of data, discover how we can help your project.
Read More
 Latest News